The easy way to make the squares for this card is to stamp your image with Early Espresso ink on crumb cake card stock. Then I made this template so I could punch my squares out evenly so they will line up with the image that is stamped on the Very Vanilla below. You can make the space between the squares whatever you want, as long as it's even. Then you can match them up perfectly with the image below and everything is lined up!

Friday, September 16, 2011
Inspired by Nature Squares
Thursday, September 15, 2011
Re-Using Old Projects


And I made these little plant holders using my Six Pack Baby Holder project!

Talk about getting some good use out of a project!
Monday, September 12, 2011
ABC Punch Art Peekaboo Frame Book
Here is my ABC Punch Art Peekaboo Frame Book! This uses the new Peekaboo Frame Die from the 2011 Holiday Mini Catalog to make an alphabet book. Under each frame is a punch art object that corresponds to each letter! This tutorial includes step by step directions with pictures for each punch art object for every letter as well as alternate options.
This is a great gift to make for your own child or to make as a gift for a baby shower or new baby.
Book measures approximately 6-1/2" x 6-1/2".
CLICK HERE
to see more details or get the tutorial!
Sunday, September 11, 2011
SNAIL Mouse Treat Card
As promised... here is my SNAIL container mouse! I told you my husband came up with a second idea, besides the ghost, and here it is! I love this little guy and so do my kids, he is so cute!
Here are the directions for how I did these cards. I do not have the step by step for the mouse so here are the ghost directions. You can see more about the ghost card HERE.
I started with a 3-7/8" x 5-1/8" piece of Basic Black cardstock and traced the top of the SNAIL tape container in the center. When you trace around the top of the container, it is slightly smaller then the base because it slants down. When you cut it out, just cut about 1/16" outside of your traced line.
You are going to put red sticky tape on the top of the lip of the plastic. you only need a few small strips to keep it on the paper. Now put your paper down over the plastic piece, just like you would over a treat cup.
On the back you are going to put sticky tape down the two long sides and one short side, the bottom. You are going to cut out a piece of paper that will slide in and out to open and get the candy out. This paper should be larger then the snail container opening, but fit inside the sticky tape on the edge. You can put a loop of ribbon on the top of this white piece so you can pull it in and out.
You are going to cut a hole in the front of your 8-1/2"x 5-1/2" card that is smaller then your white pull out piece. It does not need to be as big as I show here. It just needs to be large enough to get the candy out.
I cut a little skirt for the bottom of the ghost and filled the container with cut paper, but really it would be candy. Now when you pull on the ribbon, the back tab opens and you can put things in and out!
I have purposely left out dimensions for this because I just cut as I went to fit the size of the snail container. These do not need to be exact. Hope you have fun with it!
Subscribe to:
Posts (Atom)


 Swap Garden Bag
 Star Cards/Box
 Fun Frames
 Treasure Box, Card
 Fun Folds Open Sea
 Glider Card
 Nurse Box & Cards
 Race Car Box
 Castle Frame
 Egg Gift Card
 Bug Cards
 Tux card
 Flip Calendar
 Photo CD Album
 Gingerbread Box
 Gift Card Holder
 Fold Scrapbook
 Diabetes Purse
 X-mas Cards
 Haunted House
 Chef Pop-out
 Chef Pop-out
 Owl Cards 2
 Spooky Punches
 Foliage Box+Cards
 Owl Purse +Cards
 Bus, Fire, Police
 Briefcase & Cards
 Cylinder Purse
 AE 3 Cards
 Pie Box&Card
 Potato Heads
 Castle Album
 Scrapbook Album
 Scrapbook Album
 Purse & Wallet
 Jar Cards
 Animal Cards
 Barn & Cards
 Gardeners Bag
 Picnic Basket
 Cupcake cup
 Chocolate Candy
 Bird in Cage
 Pool Table
 Wheelbarrow
 Bird Cards#2
 Jewelry Box
 Clock Game
 Purse & Cards
 Rag Purse
 Teapot and Cards
 Sheep box & cards
 Egg Box & Chicks
 Doctor's Bag
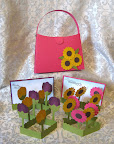 Pop-out Flower
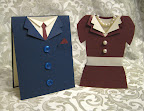 Suit Dress Card
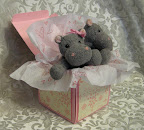 Explosion Box
 Vest Card
 Tackle Box
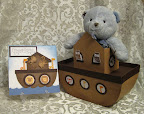 Noah's Ark
 Love Coupon
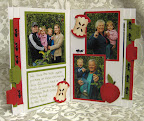 Pull-out Scrapbook
 Calendar Book
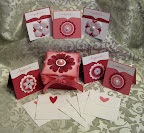 Card Box
 Cupcake Box
 Photo Box
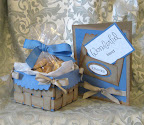 Woven Basket
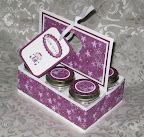 Six Pack Baby Jars
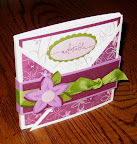 Scrapbook
 Scrapbook
 Santa Wine
 Top Note Album
 Top Note Album
 Decorative Candles
 Origami Cube-Box
 Origami Album


